
Building Our Backyard Shop: A DIY Shed with Loft Storage
- nathalievuribe
- Jan 14
- 4 min read
Last summer, we embarked on an ambitious project: replacing our aging backyard shed with a brand-new, custom-built shop. This wasn’t just any shed—it was designed with an integrated storage loft, built to last on a solid concrete foundation, and tailored to support our growing workshop needs. We documented the whole process, and you can now watch the video on how this project came to life.
In this post, we’ll take you through our DIY building journey, sharing the key steps, challenges we faced, and what we’d do differently next time.
Designing the Perfect Shed

Before we lifted a single tool, we spent time planning our build using SketchUp, a free online design resource. This allowed us to visualize our structure, create an accurate cut list, estimate material costs, and follow a detailed plan for assembly. Having a digital blueprint streamlined the entire process and minimized wasted materials.
Laying the Foundation: Concrete vs. Blocks

One of the biggest decisions we made was choosing a concrete slab over traditional concrete blocks. While blocks are easier and cheaper, our old shed had suffered from uneven settling, causing the floor to cave in. To ensure long-term stability, we opted for a concrete slab, which required 78 bags of concrete—a back-breaking but worthwhile effort. We designed the building at 12x8' to comply with city regulations, allowing us to construct it without a permit.
To prevent cracking, we compacted the soil using a tamper and reinforced the slab with a rebar grid, using plastic rebar chairs to elevate the bars for proper placement. With the help of a concrete mixer and a three-person team, we poured the slab efficiently, making sure to water it frequently over the next week to ensure proper curing.
Framing and Wall Assembly
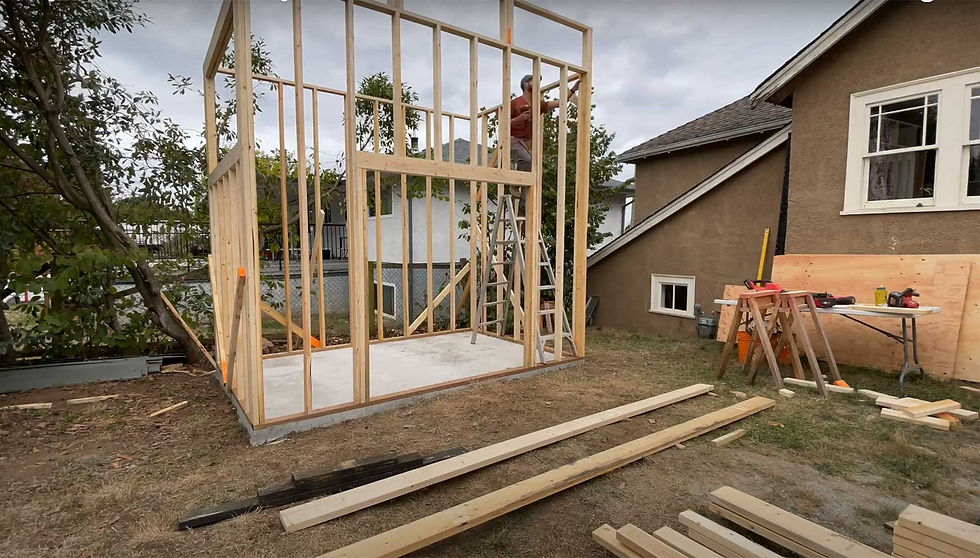
With the foundation set, we moved on to framing. Thanks to our SketchUp plan, we had precise material measurements and cut everything accordingly. As we assembled the walls, we braced them with diagonal beams for stability. Propping up the walls solo can be tricky, so we temporarily secured beams on each side until everything was properly joined together. A Milwaukee framing nail gun (a tool we highly recommend) made the process significantly faster.
Sheathing and Weatherproofing

Once the framing was complete, we moved on to sheathing the exterior with plywood. We then wrapped the structure in Tyvek to provide a moisture barrier, an essential step for durability. The roof was finished with asphalt shingles for long-term weather resistance.
Roofing
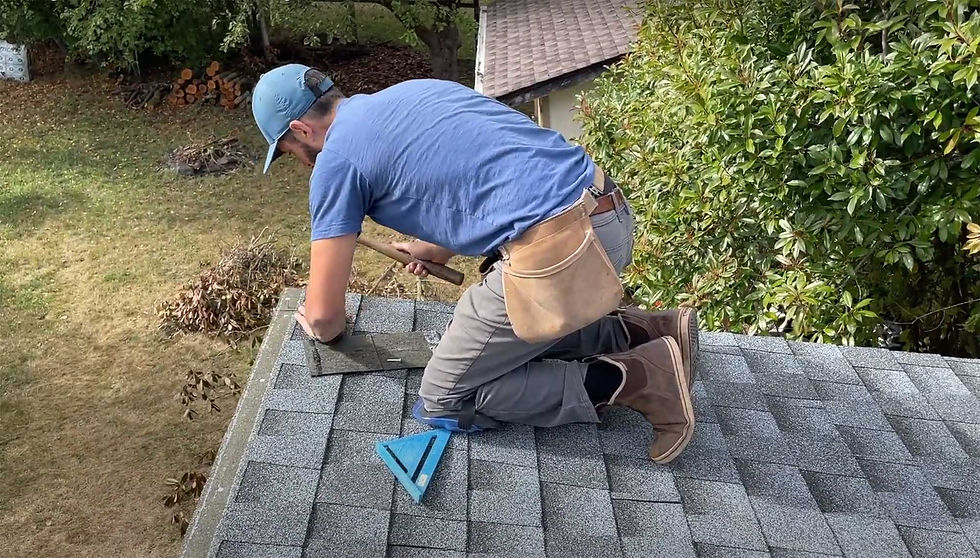
To reinforce the roof structure, we installed hurricane ties, ensuring the shed could withstand strong winds and harsh weather conditions. The shed features an extended overhang, which we reinforced with crossbeams to provide extra strength for the soffit installation. For the roofing, we staggered plywood sheets, secured them in place, and covered them with asphalt felt for waterproofing. We installed asphalt shingles for long-term weather resistance.
The Loft
Once the roof was complete, we installed the mezzanine floor. We carefully cut grooves to fit the slats along the walls, ensuring a snug and secure fit. Initially, this loft was designed for storing our rooftop tent, but it has since evolved into a general storage area, with our CNC vacuum system rigged through the floor.
Exterior Finishing: Siding, Trim, and Windows

For a sleek and durable finish, we installed vinyl plank siding, starting from the bottom with J-trim. Using an oscillating tool made cutting the planks easy, and we left a 1/4” gap on all cuts to allow for expansion.
To enhance the aesthetic, we incorporated cedar tongue-and-groove soffits and black-stained window frames, giving the shed a beautiful West Coast look. We chose polycarbonate windows for their strength and easy customization.

Bringing Power to the Shop
A year after completion, we decided to convert our shed into a full-fledged workshop, which meant bringing in electricity. We dug a 24" trench from the house to run power lines, a game-changer for our CNC machining and carbon fiber layups. The shop is now the heart of our creative work, where we develop custom fabrications for off-grid and adventure-ready gear.
Lessons Learned and What We’d Do Differently
Ventilation Matters – We should have incorporated more ventilation to prevent humidity issues.
Let the Concrete Fully Cure – Closing off the build too soon may have contributed to minor moisture retention.
Extend the Slab at the Entrance – Without an extended slab, dirt and gravel constantly get tracked inside. This is on our future project list!
Final Thoughts
Building this shed has been one of our most rewarding DIY projects. It has transformed into a functional and inspiring workspace where our ideas take shape. If you’re considering a similar build, we highly recommend careful planning, sturdy materials, and keeping future adaptability in mind.
Check out our full YouTube video where we walk you through the entire process, from the first sketch to the final touches. Let us know in the comments what you’d do differently, and don’t forget to like and subscribe to see more of our craftsmanship.
Happy Building!
Comments